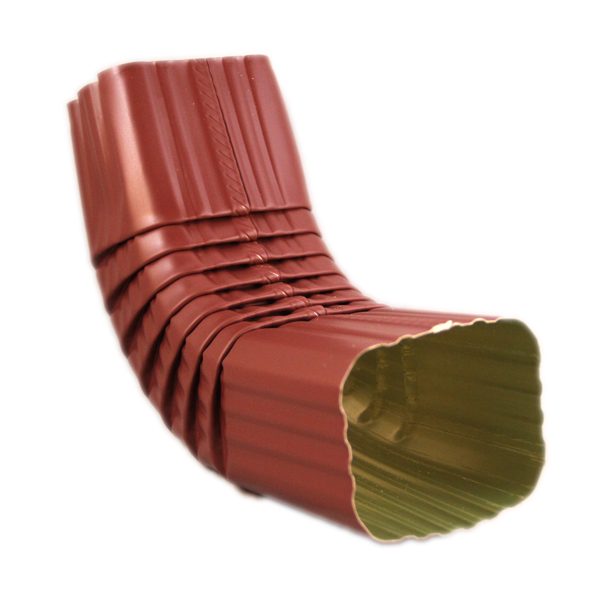
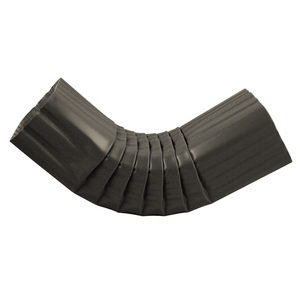
2×3" A-Style Elbow
2×3" A-Style Elbow

Couldn't load pickup availability


Navigate corners and guide rainwater with precision. Our 2×3" A‑Style Downspout Elbows are designed to connect a 2×3" Rectangular Downspout to your Gutter Outlet and redirect the flow parallel to your home’s wall. Manufactured from heavy‑gauge aluminum and finished with the same baked‑on enamel as our Gutters and Downspouts, these Elbows ensure a seamless look and a leak‑free connection.
2×3" A-Style Elbow Key Features
-
2×3" A-Style Fit
Engineered for standard 2×3" Downspouts on 5″ systems; front-to-back turn keeps the run flush to siding.
-
Durable .019″ Aluminum
Corrosion-resistant aluminum with reinforcing corrugations resists rust, impact, and weathering without restricting flow.
-
Color-Matched Finish
Offered in 20+ baked-on enamel colors to match Gutters and Downspouts for a cohesive, professional look.
-
Tight, Easy Connections
Precision crimps create a snug, leak-resistant fit; fasten easily to Outlets or other Elbows with Screws/Rivets.
-
-
-
-
2×3" A-Style Elbow Material & Specifications
- Profile: A‑Style Elbow for 2x3″ Rectangular Downspouts
- Material: Heavy‑gauge aluminum - .019″ available
- Angle: Typically 75–90° (custom # of hits available)
- Finish: Baked‑on enamel in 20+ color options
- Compatibility: 5″ K‑Style Gutter Systems with 2×3" Downspouts
Installation & Maintenance Tips
This installation information is a general guide only and may not address your specific site conditions. Always follow local building codes, safety practices, and professional methods. If you are not experienced with this type of work, hire a qualified contractor.
Installation
- Measure & fit: Test-fit Elbows dry; mark cut lines on Downspout; allow 1-2" overlap for secure connections.
- Cut & crimp: Cut Downspout with tin snips; crimp upper piece to fit inside lower connection for proper water flow direction.
- Secure joints: Apply Gutter Sealant to inside of connections; fasten with 1/4" Hex Screws or Pop Rivets on front and back.
- Position correctly: Orient A-side (wide opening) toward house; maintain downward slope; secure to house with Straps every 6-8 feet.
- Check alignment: Ensure smooth water flow path; verify no reverse slopes or binding against siding.
Maintenance
- Inspect connections: Check for loose fasteners and leaking joints seasonally; retighten screws as needed.
- Clear blockages: Remove debris from Elbow bends during regular Gutter cleaning; use plumber's snake for stubborn clogs.
- Monitor wear: Watch for corrosion at joints; reseal with Gutter Sealant when caulk cracks or shrinks.

Compare Styles & Materials
A-Style vs B-Style Elbows
A-Style Elbows have a wider opening on one side and narrower on the other, creating a more pronounced bend that directs water closer to walls.
B-Style Elbows are symmetrical with equal openings, providing gentler turns and better flow but positioning downspouts further from the house.
Best Choice: Use A-Style Elbows when space constraints require positioning downspouts closer to walls, even if it means some flow restriction. Choose 2x3 B-Style Elbows when you prioritize maximum water flow efficiency, need clearance from building structures, or want gentler drainage transitions.
Frequently Asked Questions
This is a general guide only and may not address your specific site conditions. If you are not experienced with this type of work, hire a qualified contractor.
How many Elbows do I need for a typical installation?
Most installations use a standard two Elbow configuration—one elbow at the Gutter Outlet to direct water toward the wall, and another to turn the flow downward. However, obstacles like deep Soffits or brick ledges may require additional Elbows or custom configurations.
Can you customize Elbows for unusual installation challenges?
Yes, our fabrication team can adjust Elbow angles, change the offset distance, or create multi-hit configurations to navigate around HVAC lines, window wells, or protruding Fascia. Simply provide your measurements for a custom solution.
What's the proper way to connect A-style Elbows to Downspouts?
The upper Downspout piece should be crimped to fit inside the lower connection, with the A-Style's wide opening oriented toward the house. Seal joints with Gutter Sealant and secure with Screws or Rivets on both sides.
How do I maintain proper water flow through multiple Elbows?
Ensure all connections slope downward with no reverse angles, keep joints sealed to prevent leaks, and clear debris regularly since multiple bends can trap leaves and create blockages more easily than straight runs.
What size fasteners should I use to secure A-style Elbows?
Use 1/4" Hex Screws or Pop Rivets to secure Elbow joints. Install fasteners on both the front and back of each connection for maximum holding power and to prevent separation under water pressure or wind stress.
Submit an RFQ or Questions
Please feel free to contact us - we promise to respond to your inquiry within the next business day. For longer requests, visit our RFQ page.